2014 Renegade Open Day 2 (RTT) Not-So-Condensed Battle Reports
December 3, 2014
Renegade Open Day 1 Condensed Battle Reports are HERE.
After losing the knock-out round, I headed out with some local guys to drink beers and talk 40K. I managed to avoid suffering too much of a hangover and went into the RTT looking to have a good time.
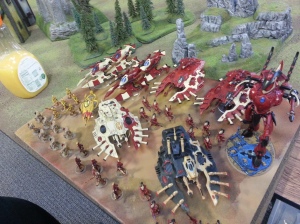
My list, as a reminder:
HEADQUARTERS
- Autarch [Warlord] (Fusion Gun, Scorpion Chainsword, Banshee Mask) 88
TROOPS
- 5 Dire Avengers; Wave Serpent (Scatter Lasers, Shuriken Cannon) 195
- 5 Dire Avengers; Wave Serpent (Scatter Lasers, Shuriken Cannon) 195
- 5 Dire Avengers; Wave Serpent (Scatter Lasers, Shuriken Cannon) 195
ELITES
- 5 Fire Dragons (Exarch; Fast Shot); Wave Serpent (Scatter Lasers, Shuriken Cannon) 260
FAST ATTACK
- 2 Hornets (4 Pulse Lasers) 160
- 2 Hornets (4 Pulse Lasers) 160
- 8 Warp Spiders 152
HEAVY SUPPORT
- Wraith Knight 240
ALLIED DETATCHMENT: Dark Eldar
- Archon [HQ] (Haywire Grenades, Webway Portal) 100
- 5 Kabalite Warriors [Troops] 40
- 1 Venom [Fast Attack] (Splinter Cannon) 65
Renegade Open RTT Round One (The Relic & ‘Maelstrom’, Vanguard Deployment): Eldar & Dark Eldar v Iron Warriors.
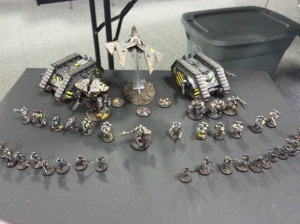
My opponent brought a thoroughly fluffy and not particularly competitive list that included a tooled up Chaos Lord (Axe of Blind Fury AND the Burning Brand of Skalathrax), a Decimator, a Heldrake (using a Helblade model–if only he’d brought that instead of the drake!), two Landraiders (Proteus?) that were immune to Melta, a small unit of Nurgle Obliterators, two units of Cultists and two small units of Chaos Space Marines. I was confident of my chances, but mindful of how my dice had betrayed me on Day One when last I faced two Landraiders.
Well, practice makes perfect. Perhaps the most important thing I learned in my 10+ games practicing The Relic was to put a useful piece of terrain where the Relic would be. In this game, I had a ruin that would provide cover saves until I was 8″ or more back toward my Deployment Zone. I put my Wraith Knight right on the line (had first turn) and deployed the three Dire Avenger Wave Serpents. I held the rest in reserves with no plans to go after the Landraiders, choosing instead to focus on the Decimator (deep-striking), the Obliterators, and the Heldrake.
Long story short: I picked up the Relic on the first turn, transferred it to a unit of Dire Avengers on turn 4, loaded back into my untouched Wave Serpent on turn 5, then sat there until turn 7. I won the Primary, but got ‘Hold your opponent’s objective’ and ‘Have a unit in your opponent’s DZ’ a combined 6 out of 14 times on the Secondary whereas my opponent got ‘Hold your own objective’ three times along with other, more reasonably obtainable, goals. He had his Chaos Lord camping on that one and one of the LasCannon-sporting Landraiders close at hand, so I decided to abandon the secondary and make absolutely sure I won the Primary. So…I lost the Secondary, only taking the game 6-4. Since there were maybe 40 players in the RTT, I knew right away that, barring some low scoring games from other players, I was out of contention. Ah well, a win is a win except when it doesn’t earn enough Battle Points, right?
Renegade Open RTT Round Two (Assassination & ‘Maelstrom’, Hammer and Anvil Deployment): Eldar & Dark Eldar v Tyranid
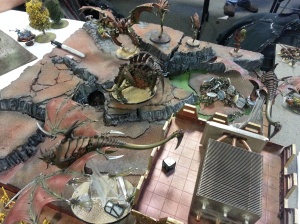
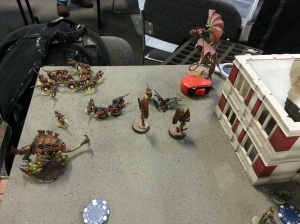
Bleh, didn’t get a good picture of his display board. That’s the Void Shield Generator in the bottom right corner.
My opponent’s list featured two units of 2 Zoanthropes, a pair of Stonecrusher Carnefexii [Note: I do not care if this is the correct way to pluralize ‘Carnifex’, I find it funny and plan to over-use it throughout this report], a pair of flying Hive Tyrants with double devourers and the haywire template, a Tervigon, 30(20?) gaunts, two Crones, a Malanthrope, and a Void Shield Generator (3 shields). I was a little annoyed by the size of the generator at about 12″ wide/deep and 4 or 5″ high to the battlement. Since it provides protection for any unit within 12″, it covered almost the entirety of his Deployment Zone. It also blocked a LOT of lines of sight. Fortunately, I’ve had experience with Void Shields so while I was annoyed by the model used to represent it, the generator itself didn’t worry me too much–I could hang WELL back with 48 and 60″ range shooting.
So…Hammer and Anvil against a ‘Nid list with only 4 flying monstrous creatures; I was confident I could kill whatever he threw down the table at me. The Primary allows each player to secretly select 3 of their opponent’s units to destroy. If you fail to get all three, you fail the Primary–no partial credit. This is another mission from the Primer Packet that I had practiced. As you nominate after deployment but before first turn, I could see what was on the table and where it was before choosing. I chose his Warlord Tyrant (which almost always makes sense as you’ll be going for Slay The Warlord anyway), a pair of Zoanthropes deployed to my left and relatively unsupported, and the Malanthrope (because: Malanthrope). I imagined he would pick the Venom, the Dark Eldar Warriors and my Warp Spiders (or Wave Serpents, since those have to be cracked anyway).
My opponent had first turn, so deployed first hiding the Malanthrope centrally and deploying everything else under the shields. I counter-deployed keeping everything way back (more shooting!). I kept one unit of Hornets on the table (they’ll get Void Shield-popping duties), but kept the Fire Dragons (Webstriking in their Wave Serpent), Warriors, Warp Spiders, and the other pair of Hornets (Outflanking) in reserve. We nominated our Assassination targets, and then I stole the initiative! Woot! Nothing’s better than catching ‘Nids on the ground!
During terrain setup, I had positioned a ruin so that I could shoot through it, through a gap in terrain in the center of the table. First, I shot the Hornets at one of the Crones (they’re worth killing), popped all three of the Void Shields and managed to leave it with two wounds remaining. I was able to get two serpents lined up on the Malanthrope, reducing it to just two wounds after popping the serpents’ shields. I shot another serpent at the non-warlord Hive Tyrant (it was in front) and put a wound or two on it. And the final serpent I shot at the ‘marked’ Zoanthropes.
I’m not certain if my opponent had practiced the mission, but he did something I couldn’t have hoped for in my wildest: He pulled both Crones DEEPER into his DZ, hiding them behind his ruin. He pushed his Tyrants and the Carnifexii up the table, spawned 18 Gaunts (but pooped out), did a better job of hiding his Malanthrope in a corner, and just generally pushed the other unit of Gaunts around to deny my Outflank/Deepstrike. His shooting/haywire templates were largely ineffective. I only had to jink with two serpents and the Hornets (if I remember correctly–I think I jinked a Warp Blast or something).
Turn two, all of my reserves come in. I thought about dropping the Warp Spiders on his end of the table, but then remember that that would be dumb. So I dropped them on my side, near enough the Carnifexii to take a couple of potshots, but far enough away to put more than 18″ between them with a good run/jetpack move. The Venom deep-struck near the Carnifexii as well and I decided to feed it to him (there was no good way to get completely out of charge range anyway). Now, despite moving his Guants all over the place, he left the top right corner (from my perspective) clear. There would be no reason to disembark (the Crones weren’t flying, but I didn’t want to expose the unit to a bajillion shots from Flesh Borers, etc.), but I could line up the serpent on the Malanthrope and unload on it. When I walked back around the table, he asked if I was going to scatter it (the serpent). It was my pleasure to inform him (and then show him the rules) that the Webway Portal does not scatter. I drop the Void Shield(s) that had regenerated and put a ton of shooting into both the tyrants, putting wounds on both. I sacrifice some shooting to make sure I am more than 18″ away from the Carnifexii. The Webstriking-serpent does its job, and the Malanthrope goes down. Now I’m sitting with my Walord in his backfield, surrounded by 30 Gaunts, two Crones, and a pair of Zoanthropes.
His turn two he lines up on my Venom with one tyrant and on a serpent/Hornets with the other. He moves the Stonecrushers (ok, I got tired of ‘Carnifexii’) toward the Venom. More importantly, he surrounds the serpent in his backfield. I know what he’s trying to do, so I confirm with him (and a TD) that any model that can’t legally finish its move (the 6″ from anywhere on the hull version of emergency disembarking) will be lost. With the shields down, and two fully-loaded Crones and a pair of Zoanthropes prepared to shoot it, I make my peace with losing it. Then, of course, miracles happen: His tyrants’ shooting stuns the Venom and takes a hull point off of a Wave Serpent. But I manage to jink, or he manages to miss, or he fails to glance/pen the serpent in his backfield enough to wreck it. It survives with 1 hull point. Intent on destroying it (and netting the unit inside as collateral damage), he declares charges with his Crones (but not the Gaunts, he holds them where they are). He also charges the Venom with his Stonecrushers, blowing it up and killing 2 Warriors (they make their morale check). The Crones are in side armor, so their Hammer of Wrath is ineffective. It takes BOTH Crones’ attacks to glance the serpent to death…and I see daylight.
When he made his charge moves, he turned both the Crones’ bases so that the narrow part was touching the hull. During the shooting phase he had the broad part of the base 1″ from the hull. That, and the 1″ he moved to get into base contact, gave me enough room to legally disembark everyone (7 models). I should have taken a picture–they were lined up on the very edge of the table.
The top of three is devastating for him: A Hornet and serpent line up on one of the Crones, taking it out, and the Fire Dragons put a couple of wounds on the other one. The rest of my army kills both tyrants, the Stonecrushers and the ‘marked’ unit of Zoeys. I have shooting left over to put a wound on the Tervigon. I have achieved my assassination mission, and he has no presence on my half of the table.
For his part of turn three, he moves the 30 Gaunts into assault position. I think Warp Blast fails, and the rest of his shooting isn’t particularly good. Two Fire Dragons soak up a lot before falling, and then the 5+ Archon with 5+ Feel No Pain tanks 6 or 7 wounds, leaving him with 1. The unit makes its morale check (otherwise it would have been lost, again), and he assaults with his Crone and his Gaunts. The Gaunts had a 3″ charge to make after killing the Fire Dragons, and he chose to send them in first. I hit twice and wound twice with Fusion Guns (in Overwatch!) and suddenly his 3″ charge is a 5″ charge. He rolls a ‘4’. The Crone makes it in and takes out the Archon (for the record: He still got paid.), and the Fire Dragons manage to do a wound back. I think the Eldar lost combat, but they make their morale check and stay stuck in.
On turn four I shoot at the Gaunts threatening my Autarch and finish off the Tervigon. There’s nothing else to shoot at. In close combat, I take two wounds on my Autarch and then he manages to stuff a Plasma Grenade down the Crone’s throat (Hooray for AP4!). The unit consolidates away from the edge of the table (mostly so they wouldn’t get knocked off), still hemmed in by the Gaunts. He shoots at and then assaults the Fire Dragons (I lose one to shooting from Look Out Sir rolls), so only the Autarch and two Fire Dragons remain. His attack rolls are terrible and we finished with a tied combat.
On turn five I just keep everything out of harm’s way. In the close combat, my Autarch is a stud, killing two Gaunts with his AP6 Scorpion Chainsword (Don’t leave home without it!). The Fire Dragon kills another. Bad dice defy the law of averages again, and he loses combat. This time, I ask him if he’s still in Synapse. Due to piling-in moves, he’s actually a half-inch out. He fails the morale check and I cut down something like a dozen Gaunts! At the bottom of five, he brings the other unit of Gaunts closer for a half-hearted charge (they fail) and his Warp Blast (the template thing, right?) scatters off of the table.
He wants to resign here, but the die roll indicates that the game should continue. I tell him that I have my Primary mission completed, and ask if he has his. He doesn’t. I ask him to tell me (if he doesn’t mind) what his final target is; it’s the Warp Spiders and he has no way to get to them even in a 7-turn game. I ask him if he’s sure he wants to resign, and he confirms it. We shake on it and that’s that. I win 10-0.
Renegade Open RTT Round Three (Crusade & ‘Maelstrom’, Dawn of War Deployment): Eldar & Dark Eldar v Dark Eldar & Eldar!
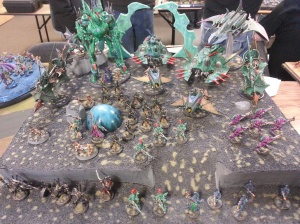
For the final round of the day, I am paired with a player from my club. I have played him many times and usually done well against him. He’s been winning as well, but is in the same position as I am of not having enough Battle Points to legitimately compete for 1st place. Here’s his army:
Seeing as how I know him and it was the last round, I recorded the game. The battle report is posted on my Youtube channel (DCannon4Life), and embedded below. Enjoy!
Battle Report: Eldar v Chaos Daemons, Brass Scorpion & CSM Allies. 2000 Points, Bay Area Open Scenario 6
August 18, 2014
I’ve been taking swings at some of the big boys lately (working on a write up of a recent tournament game vs. a Transcendent C’Tan). This video battle report features my Eldar vs a Brass Scorpion. Can we tame that beast?
Started doing video battle reports a few weeks ago. Here’s the latest, a practice game @ 1500 points using BAO Scenario 4 (Scouring).
